QRC20 Token integration
QRC20 Token
About QRC20
QRC20 is the implementation of a standard API for tokens within smart contracts on Qtum,basically it is the same as ERC20. Methods and Events:
function name() constant returns (string name)
function symbol() constant returns (string symbol)
function decimals() constant returns (uint8 decimals)
function totalSupply() constant returns (uint256 totalSupply)
function balanceOf(address _owner) constant returns (uint256 balance)
function transfer(address _to, uint256 _value) returns (bool success)
function transferFrom(address _from, address _to, uint256 _value) returns (bool success)
function approve(address _spender, uint256 _value) returns (bool success)
function allowance(address _owner, address _spender) constant returns (uint256 remaining)
event Transfer(address indexed _from, address indexed _to, uint256 _value)
event Approval(address indexed _owner, address indexed _spender, uint256 _value)
Creating QRC20 Tokens
You can use QRC20Token code to create your own QRC20 token on Qtum. For this example, we will use Qtum testnet, first getting some testnet QTUM.
After installing the Qtum Core wallet from https://qtumeco.io/wallet or https://github.com/qtumproject/qtum/releases, get the wallet receiving address by selecting Window - Receiving addresses, select and copy the wallet receiving address qXGdYmLypZRy8pTpj9EdTBHkqtv6cv99ky.

We need some QTUM to pay for the smart contract gas and transaction fees and can get some testnet QTUM from the Qtum Testnet Faucet. Paste the receiving address into the faucet address field and press the blue checkmark button.

Next, copy the token code at QRC20Token. In the QRC20Token.sol file you can change name, symbol, and totalSupply to your preference. For this example, we will edit later to name the token "QRC TEST 527", the symbol "QT527" and have a total supply of 1,000,000,000 which is entered as "10 9". We will leave decimals set for 8, to give 8 decimal places for each token, so for example, you should send a 1.12345678 token amount.

After editing the Solidity file, save it locally or just copy to paste into Remix.
Next, we will use Remix to compile the Solidity code into bytecode. In a browser, go to Remix at http://remix.ethereum.org/ and select the SOLIDITY Environment.

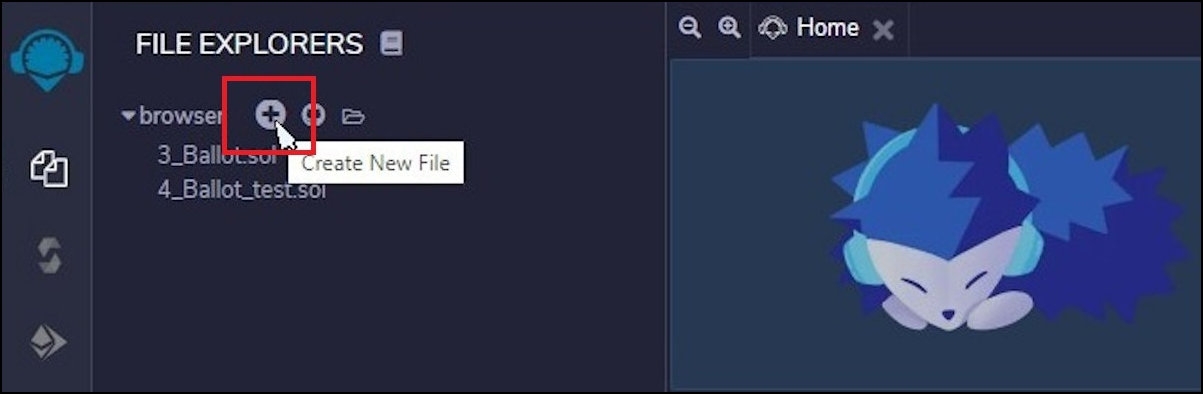
Click the "+" button to create a new file.
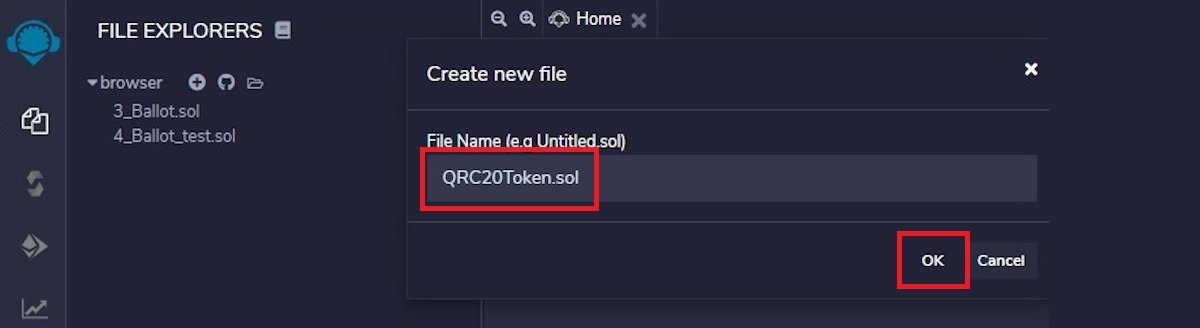
Enter the file name "QRC20Token.sol" and "OK" to create a new file.
Paste in the source code from the QRC20Token.sol file.
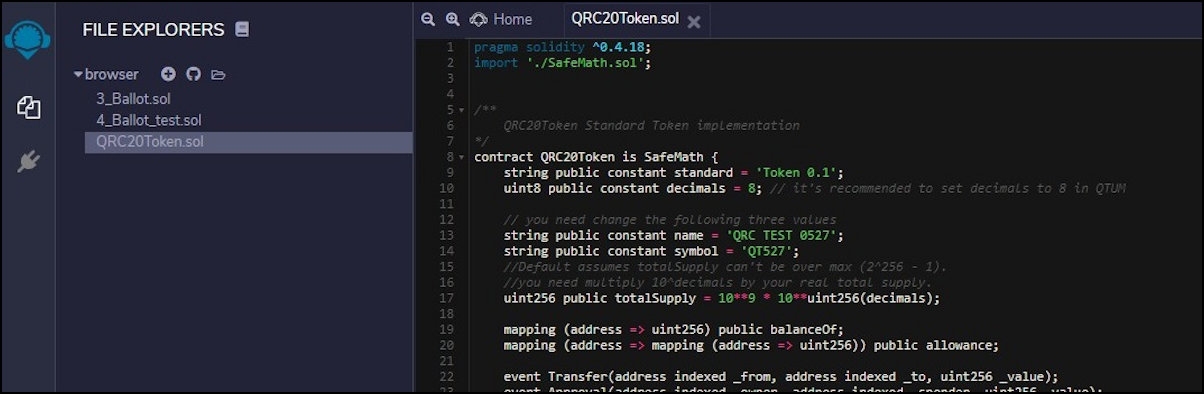
Here you can see the code has been edited to name the token "QRC TEST 527", with the symbol "QT527", and a supply of 1 billion.
Also, create a new file, enter the file name "SafeMath.sol" and paste in the code for SafeMath.sol.
Select the compiler button on the left side.

The compiler tab is shown below. You can leave the Solidity version set for 0.4.26. At the top, click the tab for QRC20Token.sol to select that file to compile, and click the blue Compile QRC20Token.sol button to compile the source code into bytecode.

Ignore the warnings.
Click on the Bytecode button to copy the bytecode.

Paste the copied bytecode into a text editor, and select just the numeric characters for the object code (shown here highlighted in blue). The object code starts with "60806" and ends with "00029" (not shown in this image).

On the wallet, go to Smart Contracts - Create and paste the copied object code into the "Bytecode" field.

At the bottom of the Create Contract form, click the drop-down on "Sender Address" and select qXGdYmLypZRy8pTpj9EdTBHkqtv6cv99ky. This sets the address to be used by the contract. Leave the gas set at 25000000 and price set at 0.0000040 unless you know how to safely change these. Click the Create Contract button and Yes to send the transaction.

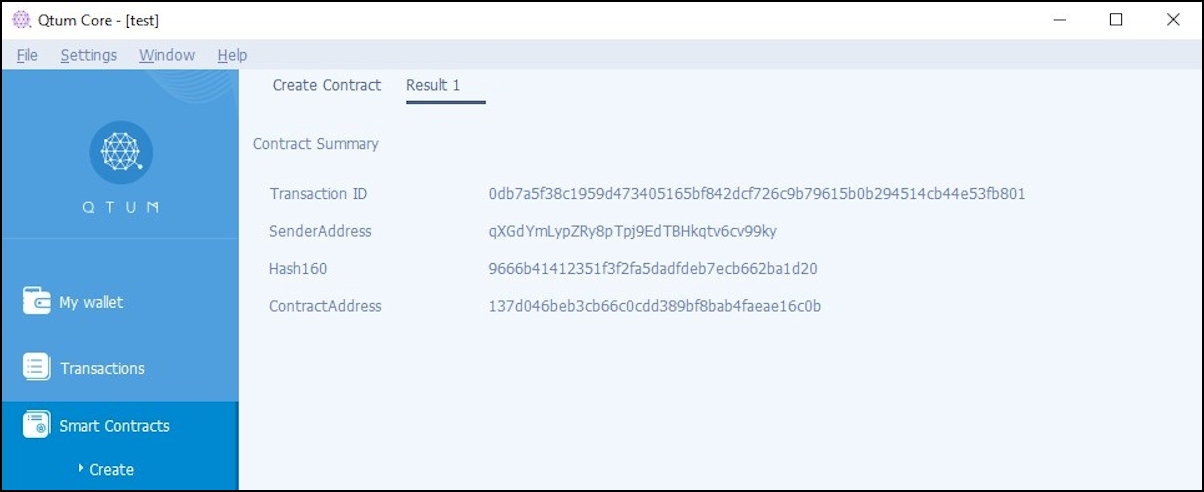
The wallet will confirm the transaction on the "Result 1" tab. Copy the Contract Address 137d046beb3cb66c0cdd389bf8bab4faeae16c0b.
The wallet Transactions page will show the transactions so far. First, the wallet received 90.0 QTUM sent from the Testnet faucet. Next, the contract create transaction sent the contract bytecode and fees of 1.01414 QTUM. Finally, the wallet received a gas refund of 0.623456 QTUM. Gas refunds are sent in the coinstake transaction, so they are show as "mined" in the wallet and must mature for 500 blocks before they can be used.

You can also see the contract create transaction on testnet.qtum.info
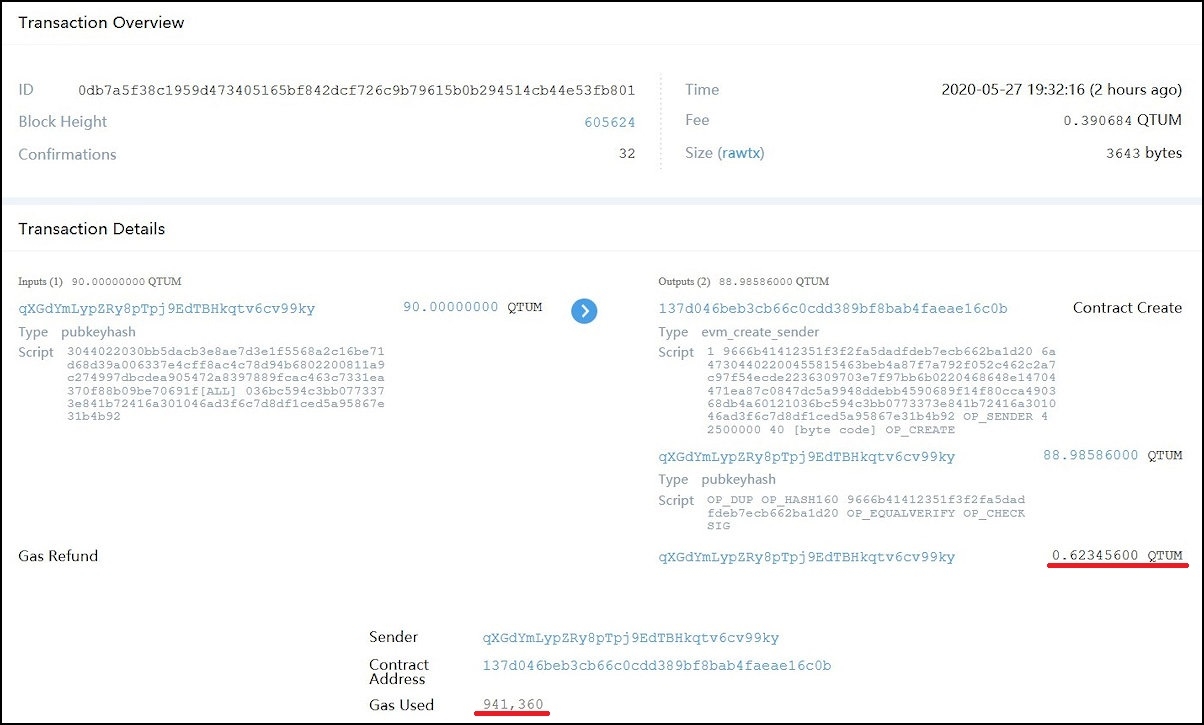
The transaction was sent with 2,500,000 gas at price of 0.00000040 QTUM. The contract creation used 941,360 gas giving a gas refund of 2,500,000 - 941,360 = 1,558,640 at price of 0.00000040 or 0.623456 QTUM for the refund.
Adding Tokens
Smart contract transactions are sent to the smart contract address, not the wallet address, and for the wallet to see or make smart contract transactions we must inform the wallet, in this case by "adding" the token. To see the new token in the wallet, select QRC Tokens and the "+" button to the right of the Add new token.

Paste the contract address 137d046beb3cb66c0cdd389bf8bab4faeae16c0b into the "Contract Address" field, and rest of the form will be autofilled. At the bottom of the form click the drop-down arrow to the right of the Token address field and select qXGdYmLypZRy8pTpj9EdTBHkqtv6cv99ky and Confirm. If the wallet is using multiple addresses, chose the correct Qtum address that was used to create the token.

You will see the Log events prompt "Enable log events from the option menu to receive token transactions". We will do this step below.

Sending Tokens
To send QRC20 tokens, select QRC20 Tokens and Send. Note there is single row listing for the QT527 token tied to address qXGdYmLypZRy8pTpj9EdTBHkqtv6cv99ky here, but tokens could be tied to different addresses of this wallet, in which case they would be listed individually and need to be sent individually.
Fill in the fields for "PayTo" and "Amount". The "Description" field is optional. Click Send and Yes to complete the transaction.

Wallet Transactions will now show the contract send transaction. Right-click on the transaction to see the details including the transaction ID.
Enable Log Events
We can follow up now on the previous prompt to enable log events. For the wallet to fully display token transactions it needs to have log events enabled. Select Settings - Options and click to select Enable log events. You must restart the wallet and rescan. The prompt will show "Client restart required to activate changes." Select OK then Yes. The wallet will exit, then restart the wallet.

When the wallet restarts, click OK to rebuild the block database.
The wallet status will show "Reindexing blocks on disk..." and "Syncing headers" for several minutes or several tens of minutes, depending on your computer.

Multiple Tokens in Wallet
QRC20 token balances are managed by the smart contract for individual Qtum addresses, even if these Qtum addresses are for the same wallet.
Continuing the example above, we sent 500 QT527 tokens to the wallet on a new receiving address qRdxBZSvUx1edUfygyHr35mVgmX9pAMLrZ. To show this new transaction of QT527 tokens in the wallet we must complete the Add Token step for this new address.

Now the tokens for each tied address are shown separately and each row can be used separately for send and receive operations.

Last updated